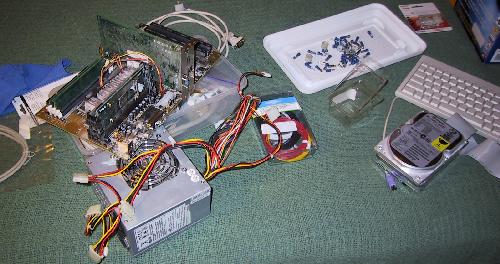
Ok, now down to work. I start by making a nice pile of parts on my
bed...
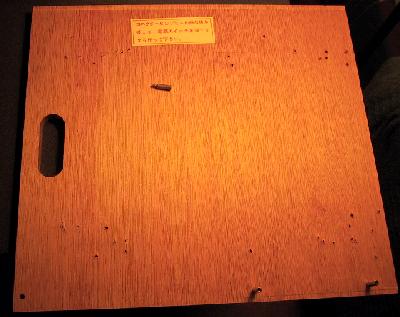
And then I draw in a pencilled area on the right of the board (leave
some space in the "entrance" of the cabinet I figure). Note 2 little
motherboard risers already screwed into the wood, these were donated
by a dead cps-1 board (a bootlegged sf2ce that I already removed chips
from to make a working sf2ce!). I guess you can't really see the pencil
lines I'd drawn, but it was basically a vertically-oriented motherboard
on the right hand side of the wood.
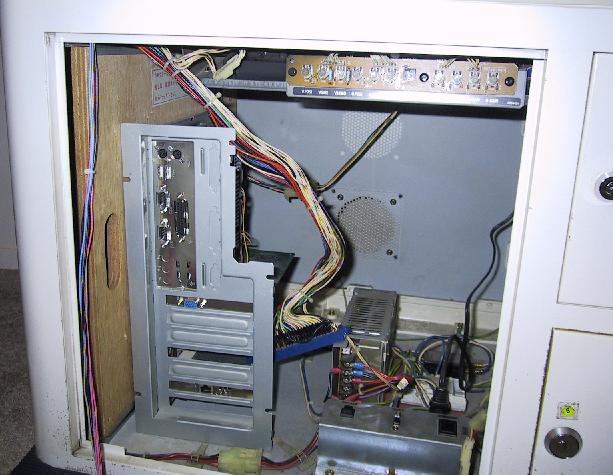
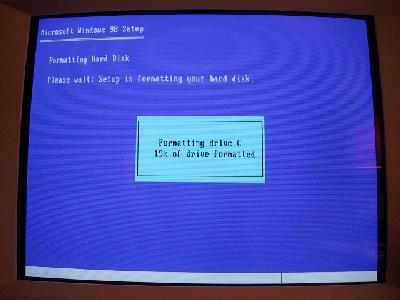
First attempt failed, I tried situating it in the cabinet and realized
I had all the connectors flush against the back wall. Reorganized a
bit, here is is all fastened up to the board (and being booted/formatted
again!). Note the tiny little keyboard, found that at the local electronics
store for $19 and couldn't resist :)
The way I have it hooked up in the photo is pretty simple. The power supply was removed from the case, as were the little power switch, reset switch, power & HDD LEDs. I yanked these all out + the speaker, and hooked them up to the right spots. The power supply will have to be pretty close the the mainboard because the main power connector is pretty short, but in thise case it's easy. You wouldn't want to spill a beer on this machine in this state, but it's surpsiringly stable. It's amazing what a psychological effect the case has on making you think all the parts are tidy and organized inside!
Learned during the installation that my old tnt2 won't boot without a monitor attached, so I will definitely have to get a different video card for the cabinet. I was already eyeing up the trident blade3d (because that's the one that a lot of vsyncmame was developed on, and also because they seem to list at about $20!), so I placed the order. When it finally got here, it was a trooper, did all the video modes I needed without too much hard work!
Windows98 is now on the machine ready to help me suck over all my important files using my little local house lan, then I thought I'd fiddle around with the boot process so it boots only to DOS for arcadeos. Turns out there's no problem using windows98 as the primary os, great little utility called blade15.exe that I found on the Vsyncmame page (mirrored here) that lets you run 640x480 in windows on the arcade monitor!
Finished copying over all the files I wanted, and mounted the thing in the
cabinet. A little tight as expected. For an added Flourish I did the video
connector (modified a VGA cable to have R, G, B, Sync, Ground outputs per
the pc2jamma page), then suddenly realized I could actually test my screen.
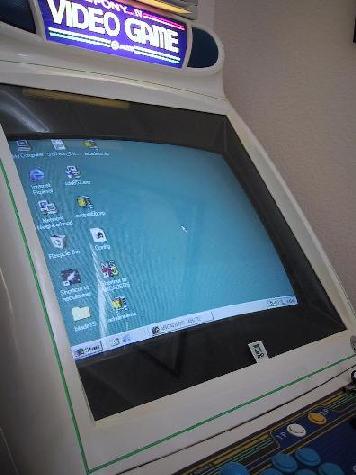
fired up a command window, did mame pacman -monitor arcade and
waited until the screen went wacko on my vga monitor, then I put in the plug
for the RGB, here's what I saw!
Not a bad picture at all. It was a little dim, but fiddling with gain and brightness on the monitor made up for it nicely. It's basically just bright outside in California, the PC drives this screen (a Hitachi, in fact) just as well as a PCB does, which is a nice bonus. Many people have issues with the video signal from the PC being dim compared to a real board. Next step, arcadeos and getting the I-Pac harness wired up to the joysticks & buttons.
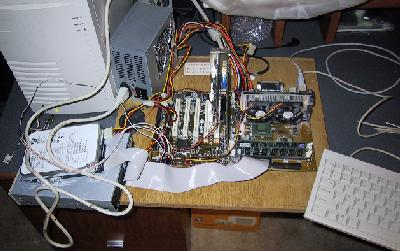
Getting that wired up took quite a while, actually caused more by the temptation to get sloppy and finish quickly! The best tool I found for this process was a molex pin extractor, so I could tolerate mistakes and fix badly wired pins. In the process of the I-Pac wiring, I also cam upon a deal for a really cheap 900mhz cpu + motherboard, so I switched to that and plonked it in. Here's what the layout looks like with the AMD motherboard & I-Pac in place:
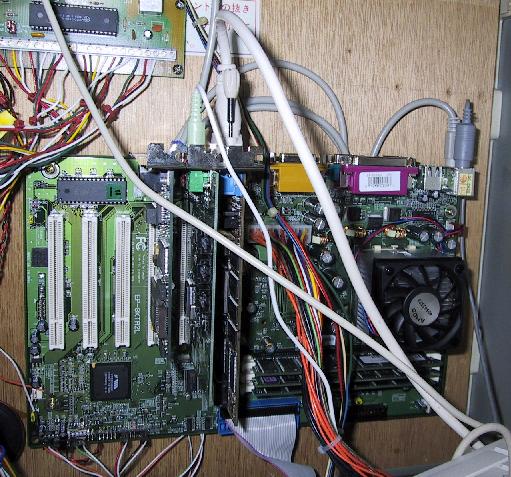
The 3 expansion cards are (left to right) ethernet, sound, and video. I hook the ethernet up to a crossover cable, and plug that into my laptop to transfer files over.
Here's the view of the whole inside cavity complete with wires sticking all over the place. The keyboard reaches out about 3' on the cable, and the touchpad/glidepoint (not visible here, you can see it in my Nebula shot below!) easily fits on the top of the cabinet. A mouse replacement was nice to have so I don't need to worry about the space to wheel it- this is like the touchpads on some laptops (I've had this one ages)
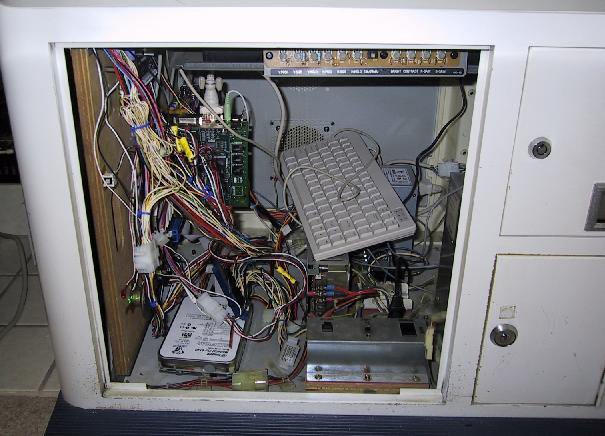
One of the reasons there is still such a rat's nest of wires is that I've left it possible to plug in jamma boards still by changing molex connectors. One hanging off the blue jamma comb (just above the hard drive in the picture) connects to the other that is currently plugged into the IPAC, and then I just switch the monitor connector from the vga cable to the internal cabinet one. I rarely bother though, the quality is great using the emulators now!
After I got my hardware done, I started working intensely on the configuration. You quickly get annoyed by the need to adjust the screen size, position, vertical hold all the time, but fortunately there is a great solution- AdvanceMame, a special version of DOS mame that has expert-level configuration menus for video. I set it up to work at the right syncrate, then you can hand-tune (center, size, etc) each individual video mode so that they are all centered, correctly set for vertical hold, etc. I ended up making one small concession, I'll adjust vertical size for some games that are vertical so that I can have horizontal games still fill the whole screen. Advancemame comes out fairly often, so keeping up on updates and debugging is important, it's an actively developed codebase, so sometimes things break & get fixed!
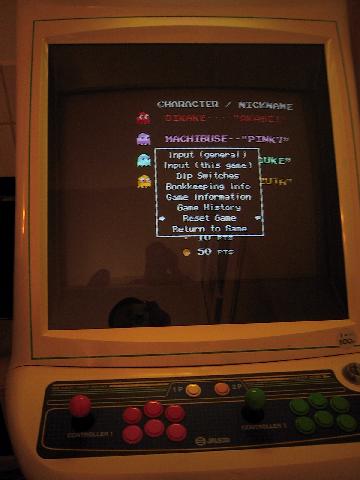
Another great addition to this cabinet is the Nebula emulator. ElSemi kindly added support for the blade15.vxd file, so the emulator works on an arcade monitor (for this video card only, perhaps). It's fun to play 640x480 with blitter effects like interpolation, 2xsai on an arcade screen. I have the original SFA3 cps2 set, and in many ways the video is *better* than the real thing! The sound also supports some hardware 3d sound processing, which results in the stereo effect being more pronounced. Finally, I can use fun cheats to play as the unselectable boss chars in some games, so the emulators really have their place even when you have the original hardware to play with!
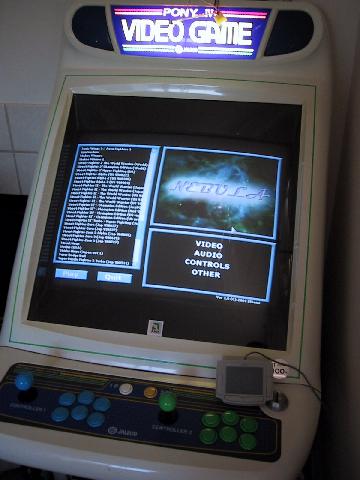
I now have speakers sitting on top of the cabinet too, I might remove the guts of the Jamma speakers inside and put my PC ones in there, or maybe hook up the amplifiers from the PC speakers to the jamma ones. Either way I'd end up somewhat killing this as a dual-purpose machine though, so I'm tempted to keep the speakers on top even though I'm pretty unlikely to ever use real JAMMA boards anymore. Hmm. Here's what the cabinet looks like all sealed up with the speakers on top (and all new controls to get rid of the pink buttons!)
